Wednesday, August 10, 2011

Classroom Craft: Cork Board


Classroom Craft Two: Nifty Cork Board

Materials:
Plain Cork Board, Ribbon (I found 3 I loved!), Paint, Masking Tape, Exacto Knife


Step One:
Tape off the edge around the cork board, use the exacto knife to make sharp edges.

Step Two:
Now the fun part!! Tape the entire cork board with the masking tape. You can leave the edges rough until the end and cut them all at the same time with the exacto knife.


Step Three:
Now this is really the fun part... all sarcasm aside! Since I love MATH and NUMBERS (...and this is going in my classroom...) I decided to sketch the numbers 0-9 on the board in different fonts and sizes, but the great thing about this is that you can do anything! You can sketch your name, flowers, sailboats... whatever your heart desires!

Step Four:
After drawing your design take the exacto knife and cut out each shape. I wanted to leave the numbers as the natural cork color so I removed the tape around them, but you can easily do it the opposite way!

Step Five:
Now paint whatever you want! I went for a blueish-yellow look, but you could do polka dots, rainbow, or anything!

Step Five:
Now the most amazing part is when you peel away the tape and you see your finished masterpiece! I was so amazed by how it looked!

Step Six:
Know you must add bows and ribbons! I screwed in two round hooks to the top so that I could tie the ribbon and bows, but you could easily use hot glue!

I hope you have fun trying this craft, or if you want me to make you one I would love too... I am trying to figure out where I could put another cork board!! :)

Monday, August 8, 2011

Classroom Craft: Fabric Pennants

Hello All!! So I have been in a super crafty mood and I have made two special classroom crafts and I can not wait to show them both to you! So... to begin grab you your favorite drink... (mine is Pepsi Max!!) .... haha


Classroom Craft One: Fabric Pennants

Materials:
Iron, Multiple Fabrics, Scissors, Ribbon, Heat'n Bond, One Piece of Paper

Step 1:
Cut 8.5 by 11 piece of paper in half, then fold the half in half... haha.

Take the half that you just folded and cut out an isosceles triangle. (It doesn't have to be perfect, because you want even notice in the end... trust me!)

Step Two:
Iron fabric... yes I know this sounds boring, but it will only take you a second! :)

Step Three:
Do some estimations to figure out how many pennants you should make of each color... I rounded so I had some extra pennants left over!

Step Four:
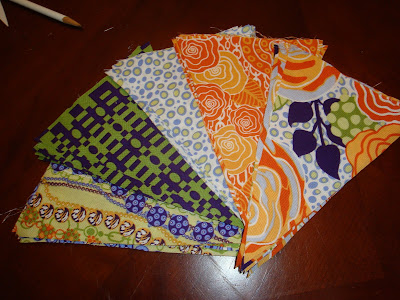
Take your fresh made pattern and trace out 11 times on each piece of fabric.

Step Five:
After you have cut out all 55 pennants line them up in the order you would like them for your cute little banner! :)

Step Six:
Take ribbon and Heat'n Bond and iron. Suggestion: The widths of my ribbon and Heat'n Bond were exactly the same; if I did this again I would make sure the Heat'n Bond was a tad bit smaller.

Step Seven:
Lay pennants out on your ironing board and iron away... yes this may take a little while!

Step Eight:
Since my ribbon was wide I decided to fold the ribbon over to make sure the pennants would not fall off! This definitely took some extra time but I think it is worth it! :)

Step Nine:


And here is the finished product! It looks much cuter in my classroom, so I will definitely post those pictures soon! :)

Have fun crafting! :)