... and I gladly present Beautiful Adventure's special event... Crafty Adventure's... grab the... pencils... glue... glitter... paper... ribbons..... and make a MESS!
today's craft: Halloween Ribbon Wreath
Forewarning... this craft takes awhile to make! Believe me! I am not a slow crafter and it took me four and a half hours... so be prepared! Also you will be overwhelmed with ribbon, ribbon, ribbon.
To begin head to a craft store and gather the following materials:
... hot glue gun, tons of glue sticks, styrofoam ring, styrofoam block, 12+ spools of ribbon, wide black satin ribbon, glitter, wooden letters for BOO, spray adhesive
Take the wide black satin ribbon and begin wrapping it around the styrofoam ring. I bought a single roll and ran out a little over halfway... I blame this on when I started I was very precise with this step and was not making wide loops... trust me the way this looks really does not matter. One spool will work as long as you make your loops wide. If you are a perfectionist then I would get two spools of black satin. Luckily I had some extra black satin from a previous project! Also as you are wrapping glue the ribbon down along the way.

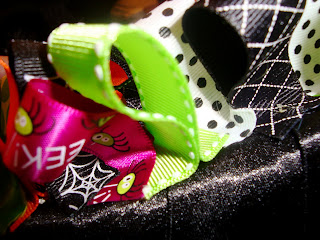
After you finish wrapping the ring.. be ready to cut tons of 4.5 inch ribbon strips! Gather all of your ribbon together and cut them into 4.5 inch strips (I came up with a quick trick to help cut the ribbon on the second picture below). To have more than enough ribbon I used 14 spools. Some of the ribbons I used two spools and others I only used one. I also had a color palette in mind when I went to Michael's. Since I was making a Halloween Wreath I used some of the discounted Halloween ribbon! (40% off right now!!)
Of course with this picture I wanted to showcase how into this project my sweet Francesca was. She sat in this spot for most of the craft and pawed at every single piece of ribbon along the way. Okay here is the cutting trick: I found that if I measured up 4.5 inches from the edge of my table and then tapped a piece of tape I could easily measure the ribbon and cut. I know it sounds simple, but it took a couple of spools before I figured it out.
After cutting tons and tons of ribbon.. now is when the real fun comes! HOT GLUE BURNS! Ekkkk.. yes my finger was burned in the process so be careful! I did not use any sheer ribbons so that helped a lot in not getting burned more than I did. You need to take each 4.5 inch strip and fold it in half and glue it together. You should leave a little bit of ribbon on the end that is not glued. Its almost like you are sewing a seam with a little extra hanging off... here is my bazillion folded and glued ribbons.
I threw them all in a plastic bag so that I could shake it to mix up the ribbons! Also... how cute are the ribbons?! I really enjoyed picking them out!
After you have glued all of the ribbons it is now time to glue them onto the black satin styrofoam ring. This is one of the fun parts!
Now you can really see that the seam makes the loop and then you have little tails. The tails are used to glue all of the ribbon to the wreath. The more ribbon you put on your wreath the fuller it looks! When I got to the sides of the wreath I glued the loops vertically.. its hard to explain.. just check out the picture..
To make the BOO take the spray adhesive and spray on the letters then glitter! This is super messy and I am sorry I don't have pictures, but my hands were covered with glitter! I actually forgot about putting anything underneath the letters when I sprayed them so now I have glitter glued to my patio... haha.. worst part is that it is the outline of an "O."
To finish the project take the styrofoam block and cut little cubes out of it... these will help your BOO stick up off of your ribbons. You can camouflage them with more ribbon loops!
I must say I am very proud of the finished project, but it did take awhile. I am sure this would be a great two day project.. but I like to finish the same day! I can't wait for you guys to make one! I love it though because you can adapt it to any season or holiday!
Have fun crafting!